Installing a Garden Fountain
All our garden fountains and water features are supplied ready to run including a pump fitted with 10 metres of cable as standard. Larger fountains and water features are supplied in easy to assemble sections.
All our fountains and water features are self contained and can sit on top of a patio or terrace, no need to dig holes or have a separate reservoir. Once the fountains are filled the pump simply recycles the water within the fountain. The pumps can easily be adjusted to enable just the right amount of water to produce the best effect.
Most of our fountains can also be used as a center piece for a pond but please state this when ordering as small changes need to be made to the cable gland
This article will go through the process of installing an Abbey garden fountain, although we supply many different types of water features and garden fountains this article will include some aspects common to all our fountains and water features such as the cable gland and general points to note.

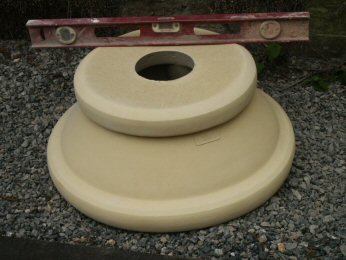
| Place the fountain base section in your chosen location, the picture is of a gravel bed but can also be placed on concrete/paving. The bottom edge of the base section has a groove cut into it so your electric cable which runs the pump can exit to the rear of the fountain or if you prefer it can go straight down into a conduit. The base section is hollow so if you want to connect to an existing cable in your garden this is a good place to put the connection. It is good practice to make sure each section is level as you build it up, no cement/glue is required. |

| Place the second section on top of the base, you will note all sections have the 'Kinsman' design mark, this will always appear the right way up if the part is in the right orientation |

| Place the main fountain bowl next to the base sections and place a block under one side so that you can access the underneath, this is the stage where the electric cable for the pump is threaded down through the cable gland in the bottom of the main fountain bowl. Pass the cable down through the black nut and pull out from under the bowl. Leave a couple of inches of cable inside the main fountain bowl beside the pump then tighten the black nut, this seals the main fountain bowl. |

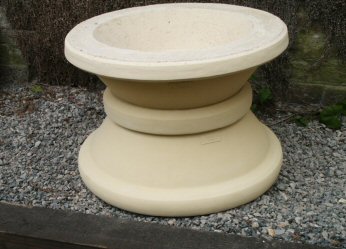
| Before you lift the main fountain bowl onto the stand feed the power end of the electric cable down through the base sections and out the bottom to go to your power source. Lift the main bowl onto the base sections pulling through the slack cable as you do, avoid trapping the cable between the parts as this can damage the insulation of the pump cable. |

| Push the clear plastic pipe over the pump outlet on top of the pump. Place the next section over the pump and pipe, this hides the pump from view and forms the first part of the assembly that supports the second fountain bowl. |

| Place the second small section over the pipe and onto the first section, these two parts mirror the large base sections on a smaller scale and support the second fountain bowl. |

| Place the small fountain bowl on top of the small sections feeding the plastic pipe up through the bottom of the small bowl so that the pipe sticks out the top, if you have a spray attatchment trim this pipe to leave 10mm sticking up and push in your choice of spray attatchment. If you have the pineapple top just slide it down over the pipe. |

| Fill your fountain with water and turn on the pump, keep the water level above the top of the pump for proper functioning and thats all there is to it.
If you have any questions about this assembly or any other of our water feature or garden fountain designs just use the Contact Us form and we will be happy to advise. |
Watch a short video of this garden fountain running

 Portland (P)
A soft natural white colour stone

 Bath Stone (BS)
A light honey colour stone

 Green (G)
A medium olive green stone

 Terracotta (T)
A pale and sun baked terracotta

 Dark Terracotta (DTC)
An earthy Tuscan red/brown terracotta

 Slate Grey (SG)
A cool dark slate grey
Colours may vary slightly on your screen due to digital processing. For more information see Colours information


